n1mm
How to get WSJT-X, JTAlert and N1MM Logger+ all working together
How to get WSJT-X, JTAlert and N1MM Logger+ all working together
Compiled by Todd, N3PKJ
This will be a step by step instructional on how to WSJT-X, JTAlert and N1MM Logger+ all working together, not using the Digital Interface within N1MM Logger+. I will assume that at least you have WSJT-X alone working correctly with your radio, having CAT Control plus audio to and from WSJT-X. If you need help with setting up WSJT-X please refer to WSJT-X 2.1 User Guide. So now let’s get started. We start with some important things in WSJT-X.
In WSJT-X.
1. Go to file…..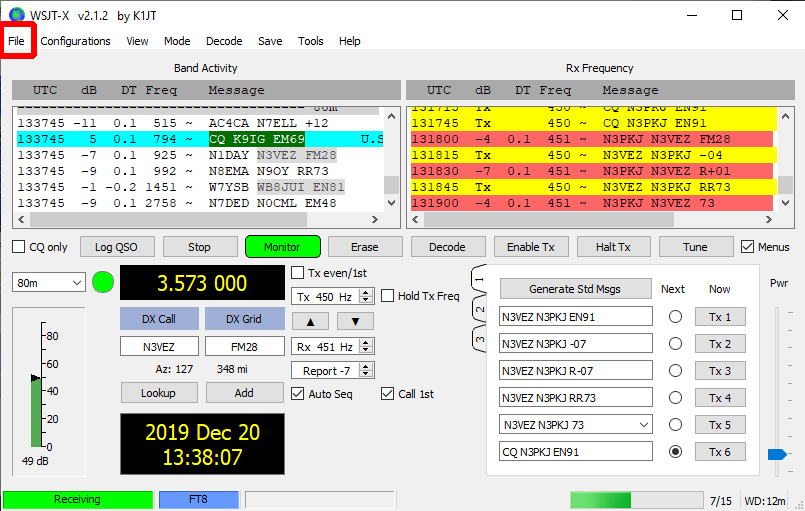
2. Then to Settings…..
3. Then to the Reporting Tab…..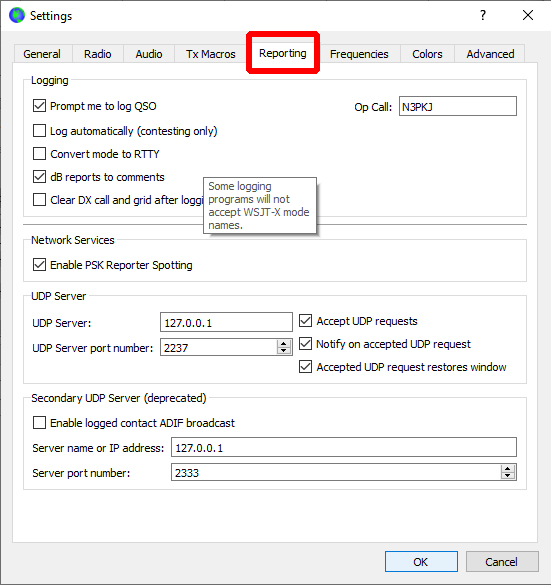
4. Next in the UDP Server section…..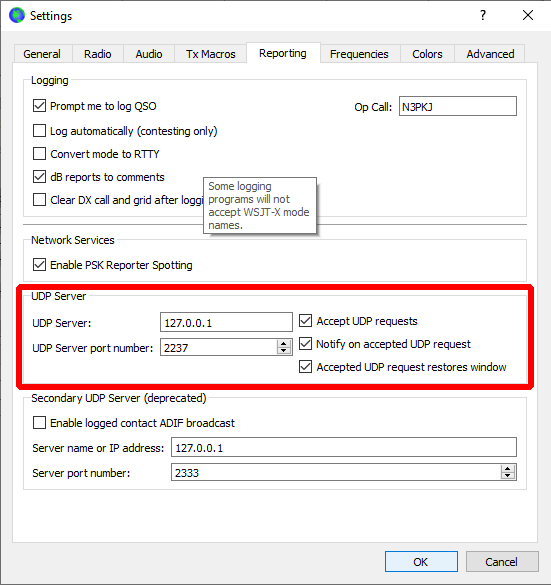
5. Make sure the 3 checkboxes on the far right are checked. A. Accept UDP requests B. Notify on accepted UDP request C. Accepted UDP request restores window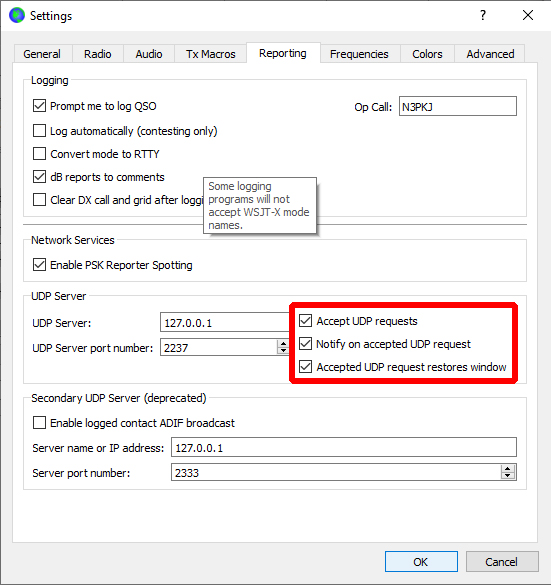
6. Next in the Secondary UDP Server (deprecated) section…..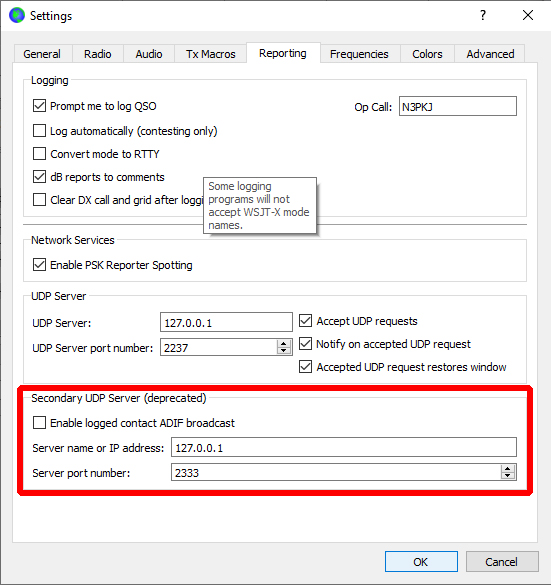
7. Make sure Enable logged contact ADIF Broadcast is unchecked. (deprecated) section…..
8. Now let’s look at JTAlert.
9. Go to Settings…..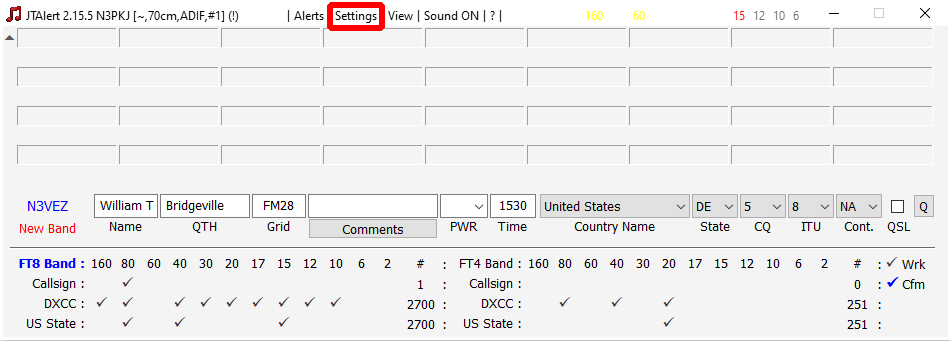
10. Then to Manage Settings…..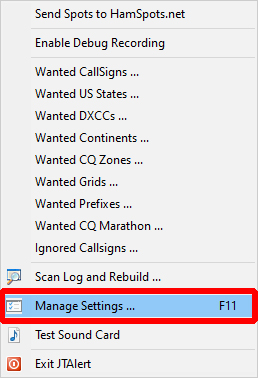
11. Then to Logging……
12. Then to Last QSO API……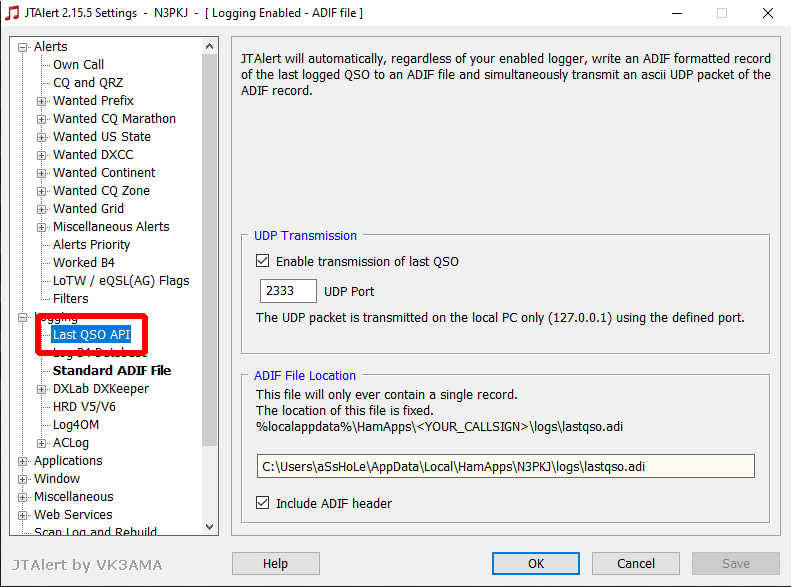
13. Then in the UDP Transmission section……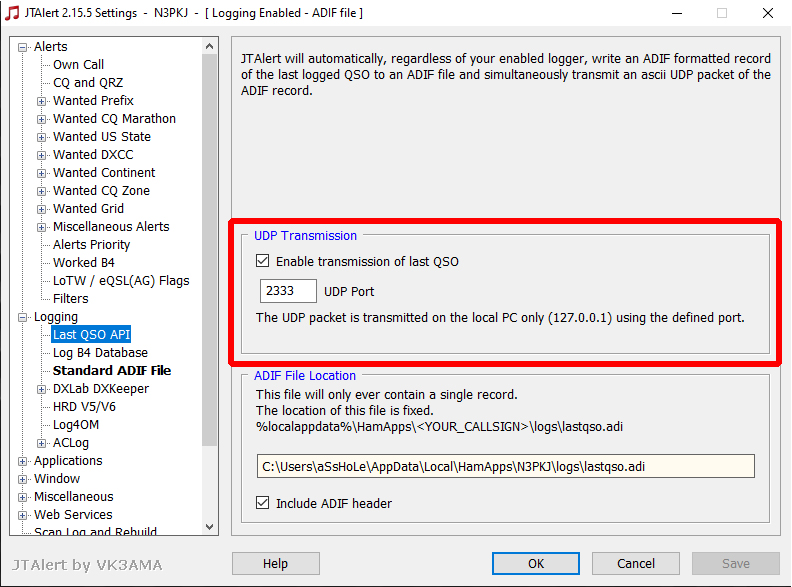
14. Check the box Enable transmission of last QSO…..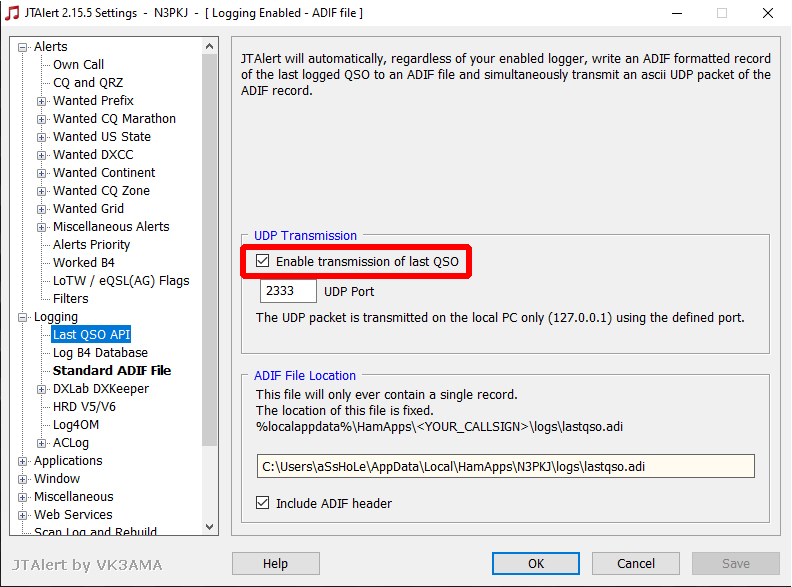
15. Then in the UDP port box…..
16. Next go back to the list on the left and go to Applications…..
17. Then to WSJT-X / JTDX…..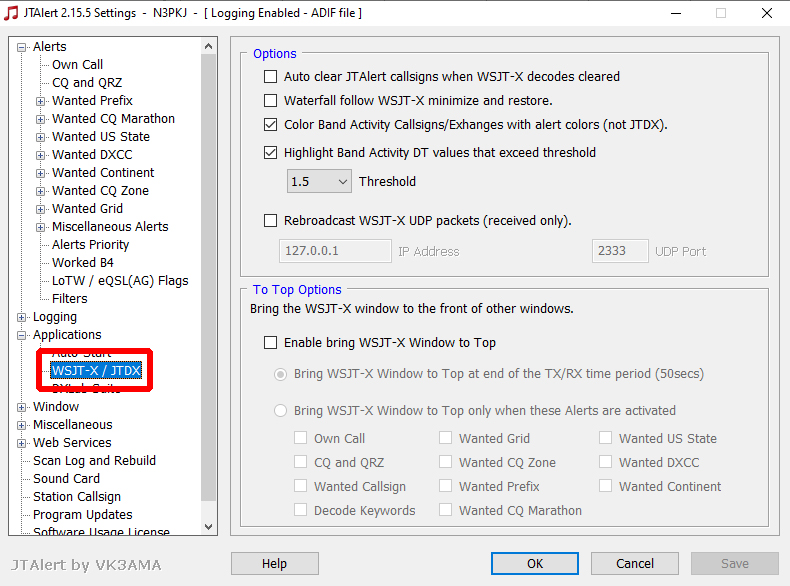
18. Now in the Options section……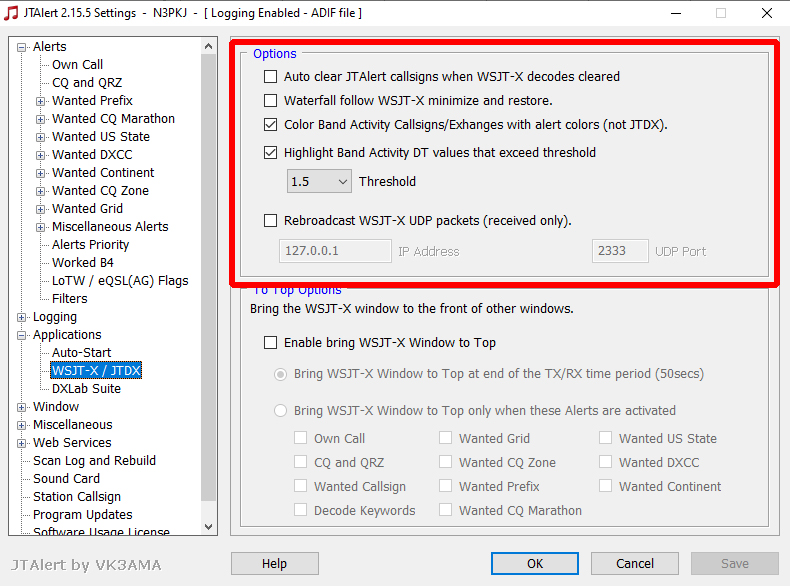
19. Make sure the Rebroadcast WSJT-X UDP Packets (received only) box is unchecked…..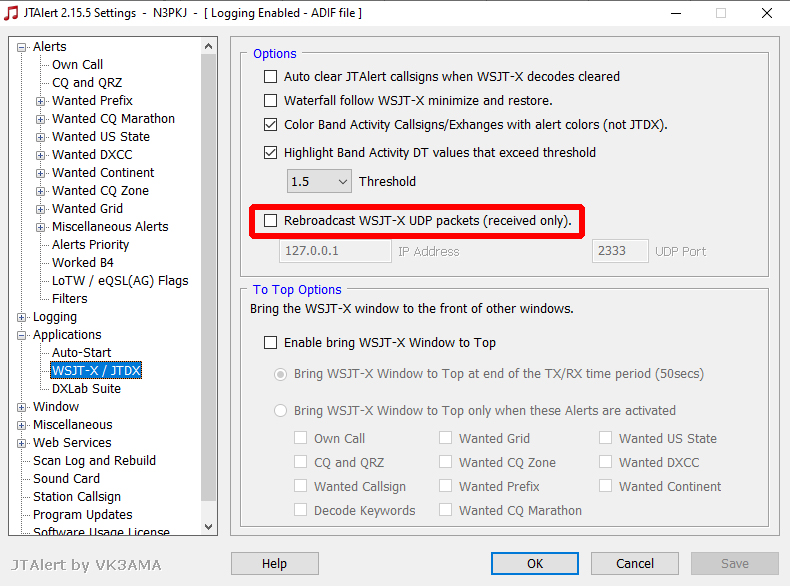
20. Now let’s look at N1MM Logger+. This part gets a bit tricky, but I will walk you through it. I will assume that you have N1MM Logger+ configured for CAT control to your radio. We have a few maintenance things we need to take care first at this point, make sure N1MM Logger+ is not running. For this part you should familiarize yourself with the Multiple INI Files section in the N1MM Logger+ Docs located at https://n1mmwp.hamdocs.com/setup/software-setup/#multiple-ini-files. You need to navigate to C:\Users\<your username>\Documents\N1MM Logger+\ (Replace “<your username>” with your username for Windows.). Mine happens to be C:\Users\*******\Documents\N1MM Logger+\. You can find this folder in your Documents also.
The N1MM Logger+ Folder…..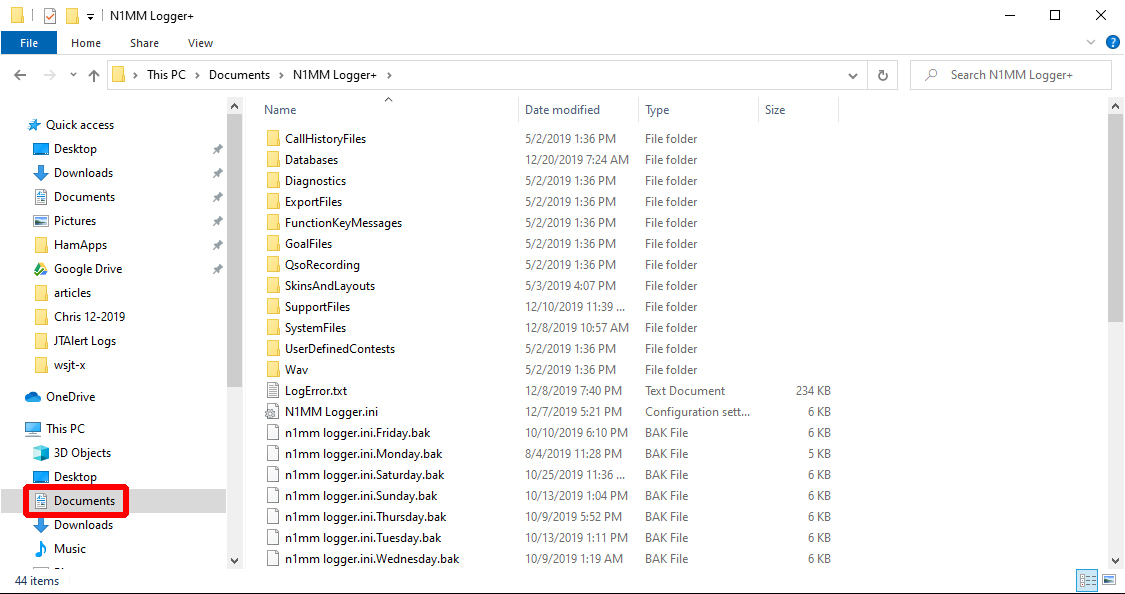
21. Locate the “N1MM Logger.ini” file.
The N1MM Logger.ini file…..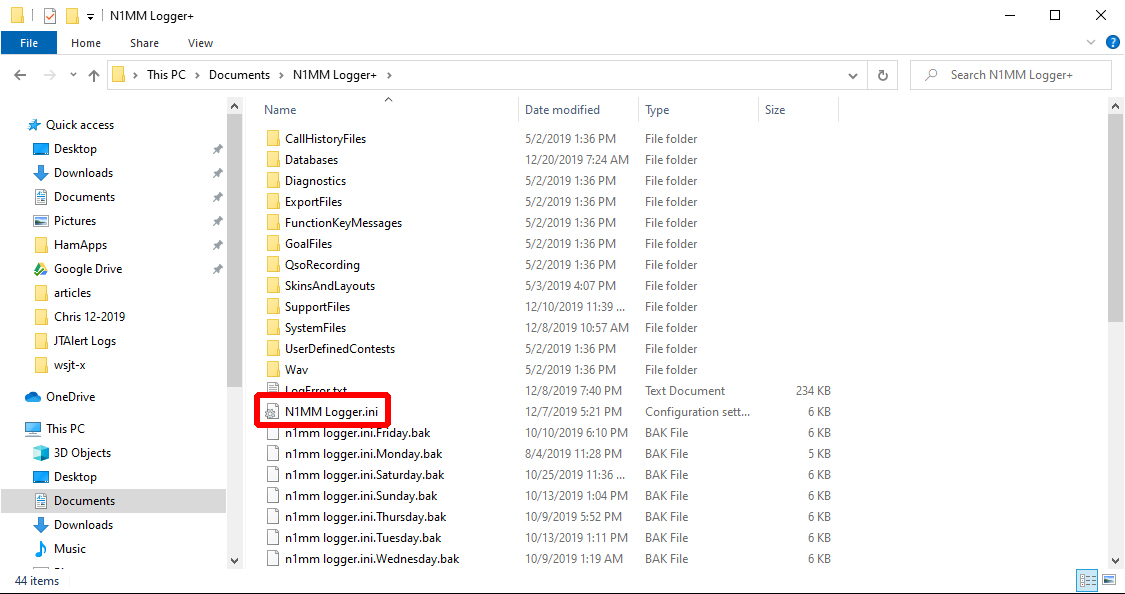
22. Then make a copy of it. To do so click on the file to highlight it.
Highlighted N1MM Logger.ini file…..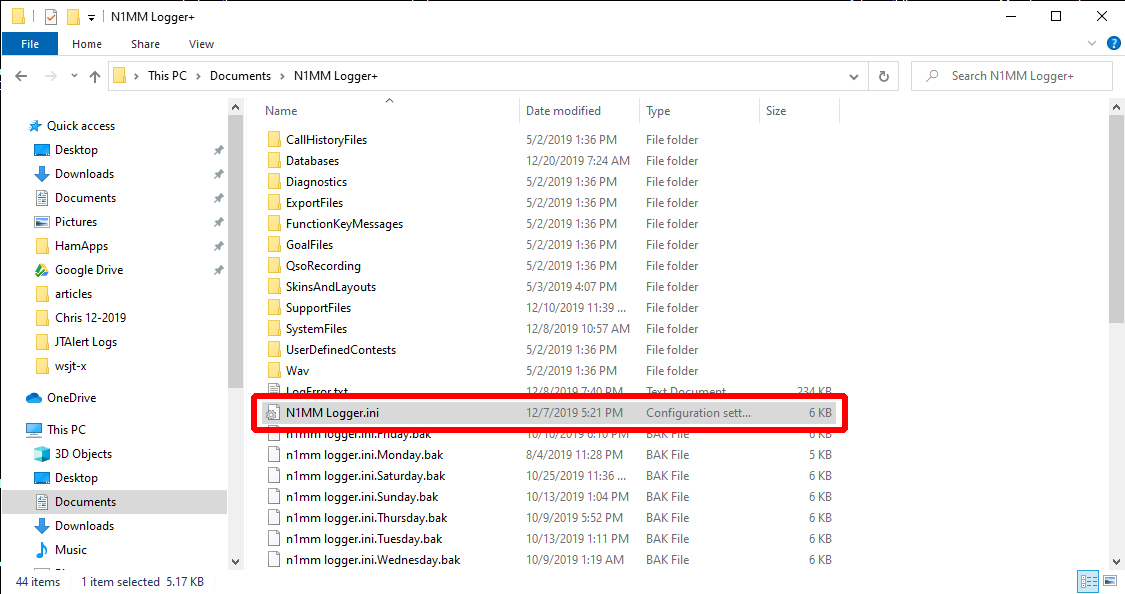
23. Next press and hold the control key and single left click on the file dragging it anywhere in the Windows Explorer window. You should then have a file called “N1MM Logger – Copy.ini”.
The “N1MM Logger – Copy.ini” file….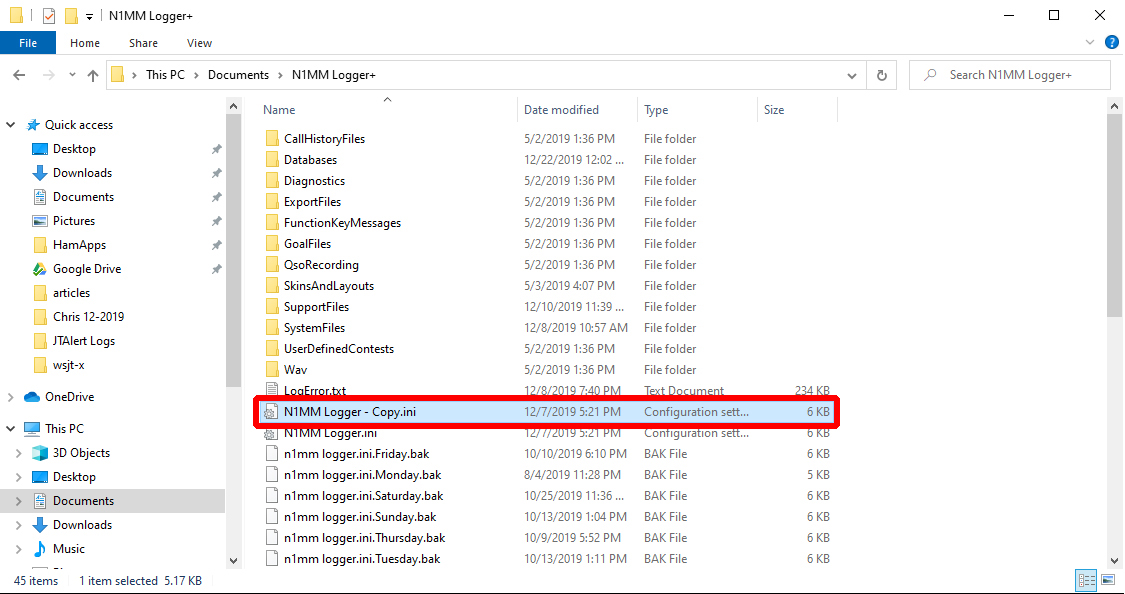
24. Next we will rename this file for use with your radio. Single right click on the “N1MM Logger – Copy.ini” file and select rename.
Rename.
….
Next “N1MM Logger – Copy” should be highlighted (Figure 1). Hit the right arrow key and then backspace the word “Copy”, replacing it with “Radio”. (Figure 2). This will be the INI file we’ll use for logging without the use of WSJT-X or any other third party programs, such as MMTTY or Fldigi. (I suggest making separate INIs for each if you use either.)
Figure 1.
…..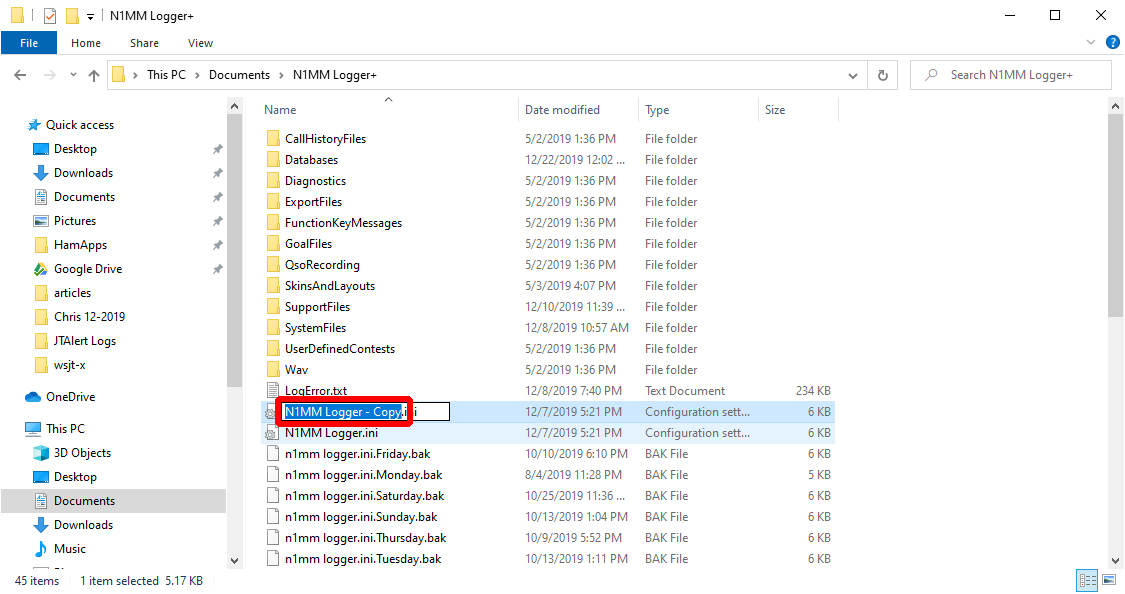
Figure 2…..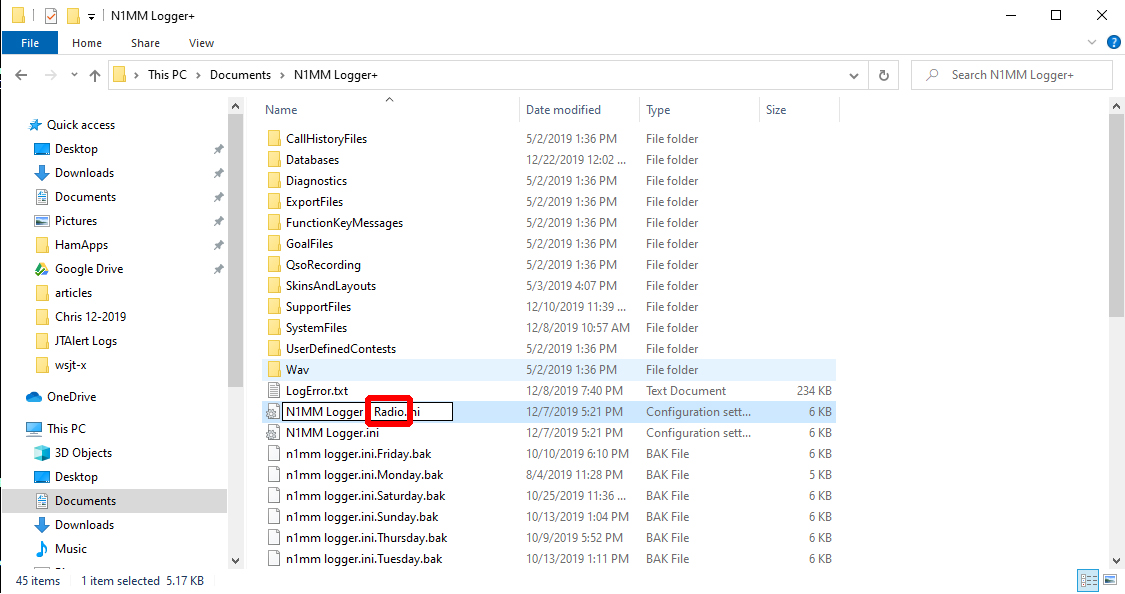
25. Now we need to make second INI file to be used with WSJT-X.
26. Locate the “N1MM Logger.ini” file again.
The N1MM Logger.ini file…….
27. Then make a copy of it. To do so click on the file to highlight it.
Highlighted N1MM Logger.ini file.
28. Next press and hold the control key and single left click on the file dragging it anywhere in the Windows Explorer window. You should then have a file called “N1MM Logger – Copy.ini”.
The “N1MM Logger – Copy.ini” file.
29. Next we will rename this file for use with WSJT-X. Single right click on the “N1MM Logger – Copy.ini” file and select rename.
Rename……
Next “N1MM Logger – Copy” should be highlighted (Figure 3). Hit the right arrow key and then backspace the word “Copy”, replacing it with “WSJT-X”. (Figure 3). This INI file will be used with WSJT-X.
Figure 3.
Figure 4.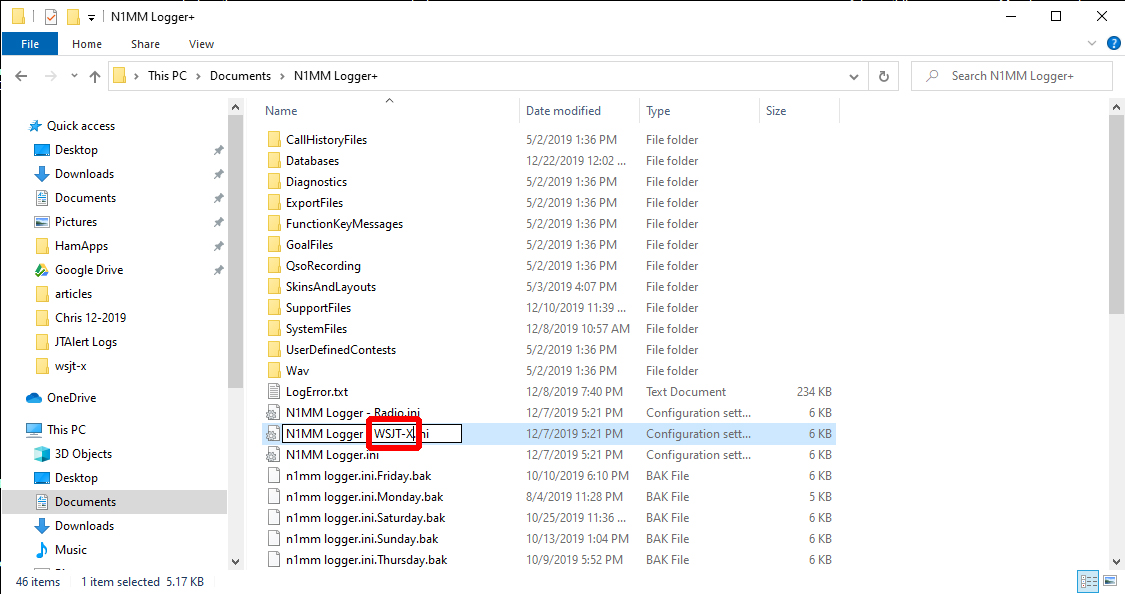
30. Now I will assume that you have a N1MM Logger+ shortcut on your desktop. We will need to make a copy of this too. That will start up N1MM Logger+ using these separate INI files we created. Making a copy of this shortcut is that same process we did for the two INI files we created. Locate this shortcut on your desktop.
N1MM Logger+ shortcut……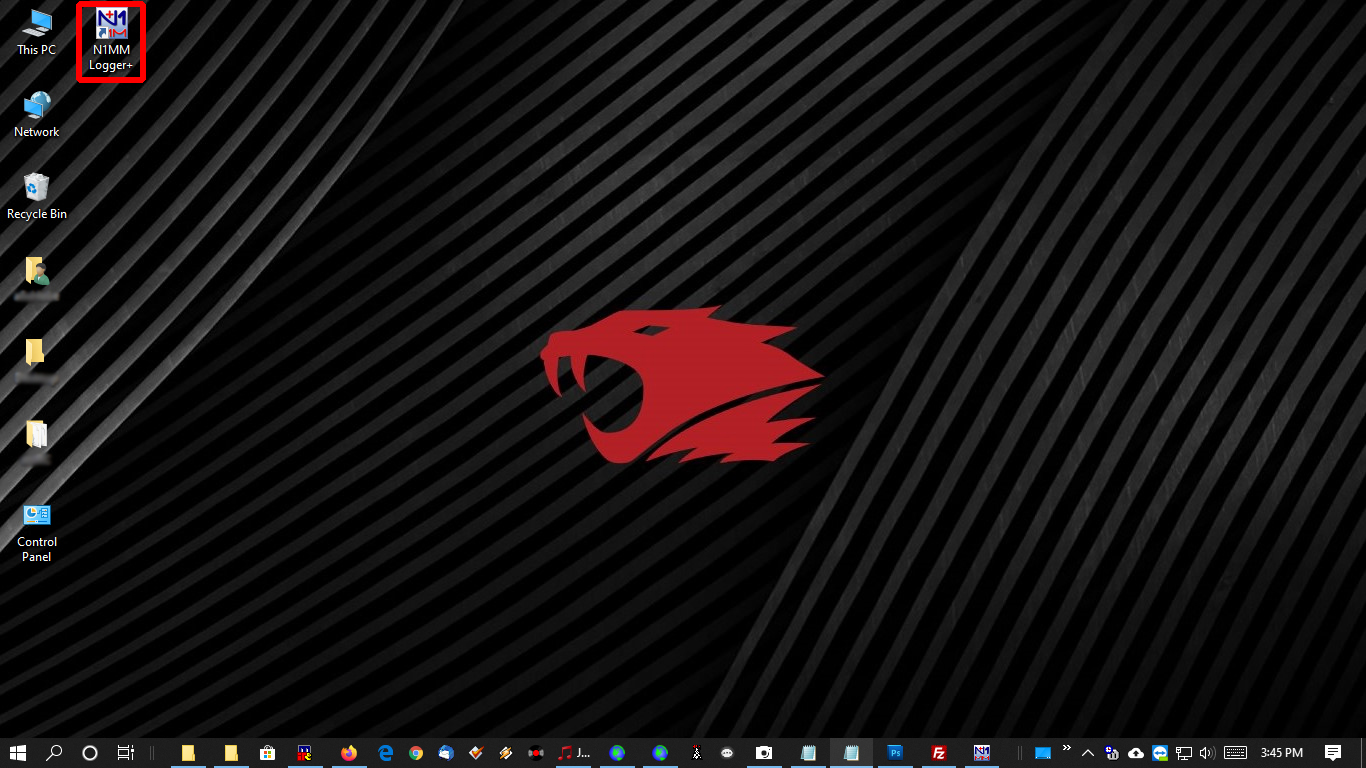
31. Single left click on the N1MM Logger+ shortcut to highlight. Next single left click on it then drag underneath the already existing shortcut.
“N1MM Logger+ shortcut Copy”.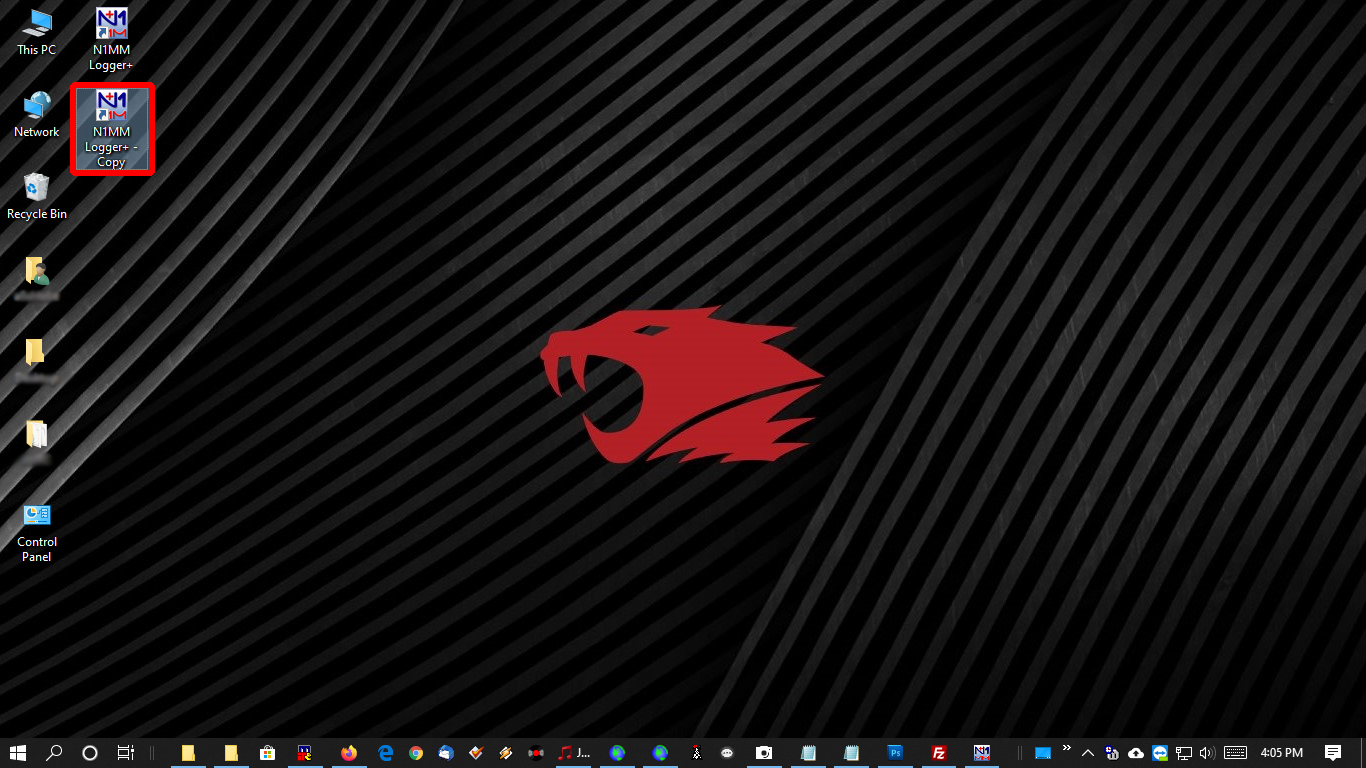
32. Now we need to rename this “N1MM Logger+ shortcut Copy” shortcut. Next single right click on this “N1MM Logger+ shortcut Copy” shortcut and then select rename.
Rename.
33. Next “N1MM Logger – Copy” should be highlighted. Hit the right arrow key and then backspace the word “Copy”, replacing it with “WSJT-X”.
Rename.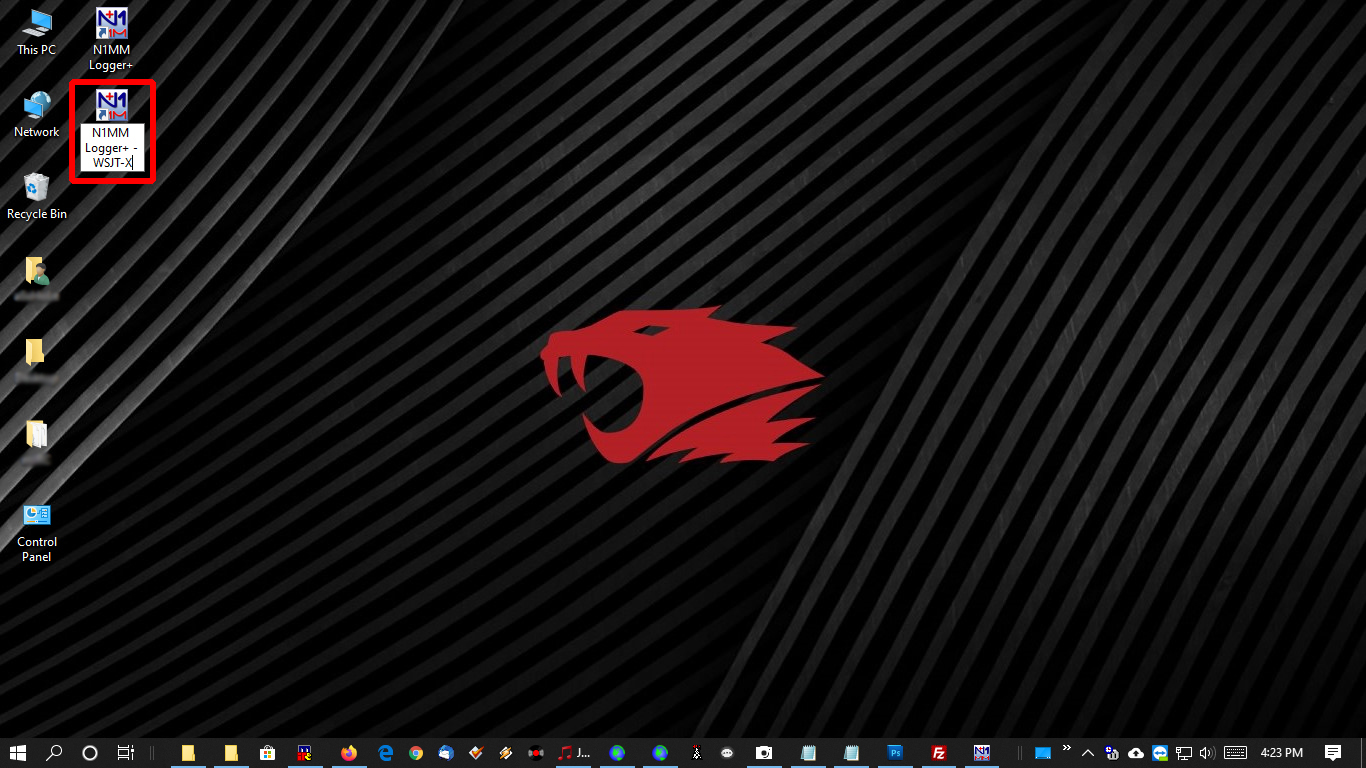
34. Now let’s rename the original shortcut that will be used with the radio. Using the same process as above but adding “- Radio” to it.
adding “- Radio”.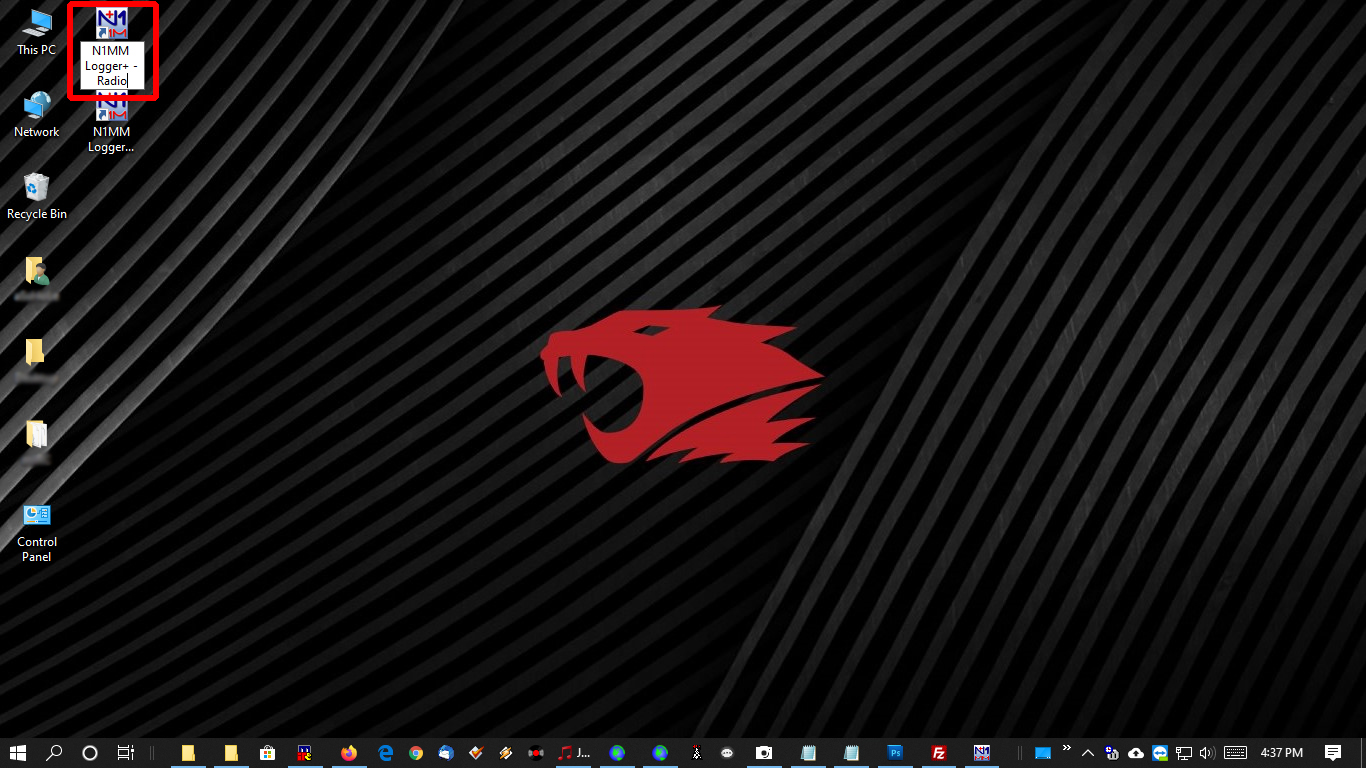
35. Now we need to point both of these shortcuts to the correct INI files.
36. First locate the shortcut we labeled “N1MM Logger+ – Radio” then right click on it. Select properties.
Select properties.
37. Now in the “N1MM Logger+ – Radio” properties window we need to change the target box to read “C:\Program Files (x86)\N1MM Logger+\N1MMLogger.net.exe” Ini=”C:\Users\*******\Documents\N1MM Logger+\N1MM Logger – Radio.ini” (with the quotation marks as shown). Adding Ini=”C:\Users\*******\Documents\N1MM Logger+\N1MM Logger – Radio.ini” to this line, making sure there is a space after “C:\Program Files (x86)\N1MM Logger+\N1MMLogger.net.exe”. Make sure you put your username for Windows here, replacing *******.
Select properties.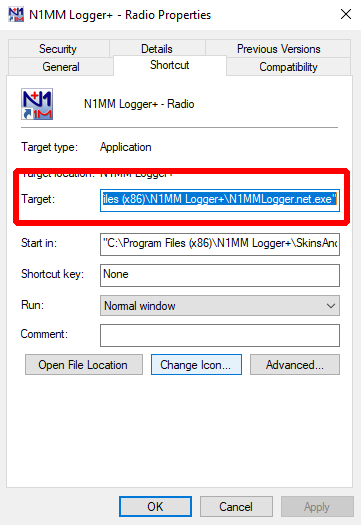
38. Next we need to do the same with the “N1MM Logger+ – WSJT-X” shortcut. In the “N1MM Logger+ – WSJT-X” properties window we need to change the target box to read “C:\Program Files (x86)\N1MM Logger+\N1MMLogger.net.exe” Ini=”C:\Users\*******\Documents\N1MM Logger+\N1MM Logger – WSJT-X.ini” (with the quotation marks as shown). Adding Ini=”C:\Users\*******\Documents\N1MM Logger+\N1MM Logger – WSJT-X.ini” to this line, making sure there is a space after “C:\Program Files (x86)\N1MM Logger+\N1MMLogger.net.exe”. Make sure you put your username for Windows here, replacing *******.
Select properties.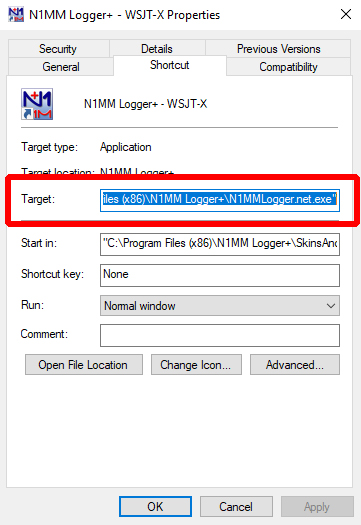
39. Finally we are done with these maintenance operations we needed to get done. So now we will start to configure N1MM Logger+ for use with WSJT-X.
40. Now start N1MM Logger+ use the “N1MM Logger+ – WSJT-X” shortcut we made. Once N1MM Logger+ opens, go to config.
Config.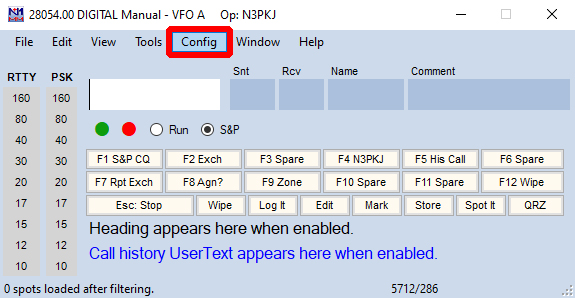
41. Then select “Configure Port, Mode Control, Winkey, etc…”
Config.
42. Now in the Configurer go to the Hardware tab.
Hardware tab.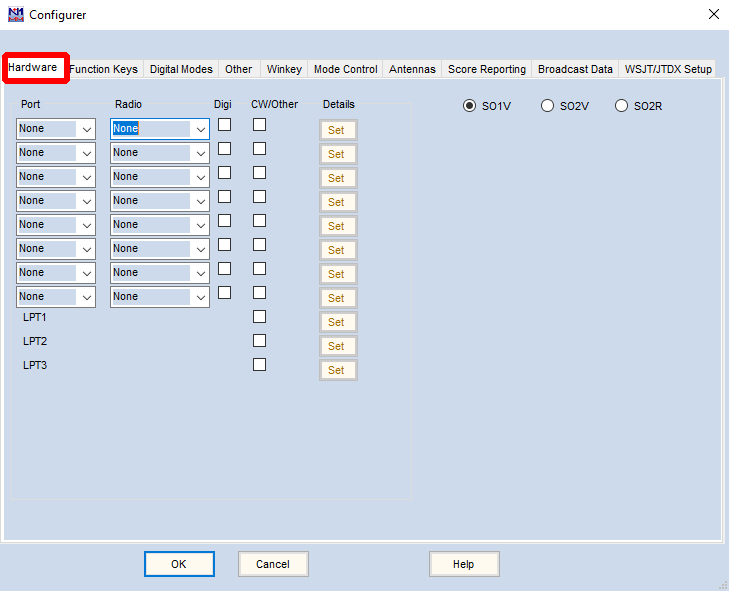
43. Make sure Port all reads “None”
Port.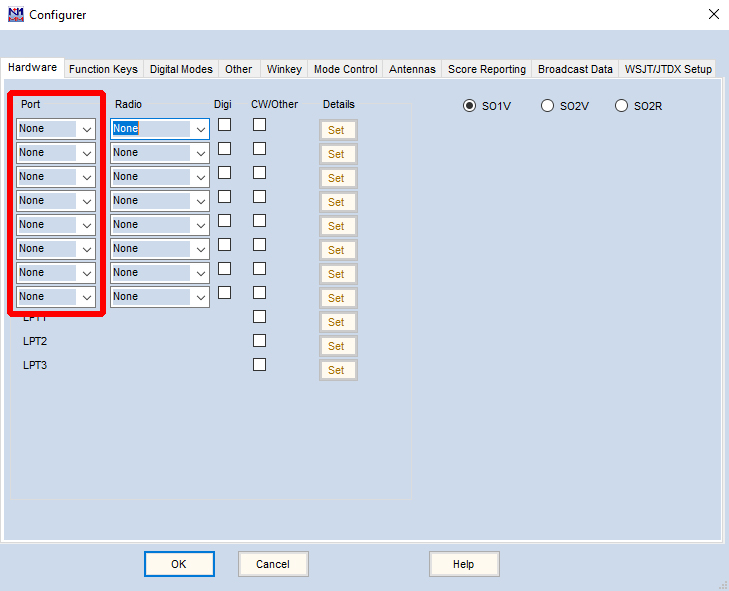
44. Make sure Radio all reads “None”
Radio.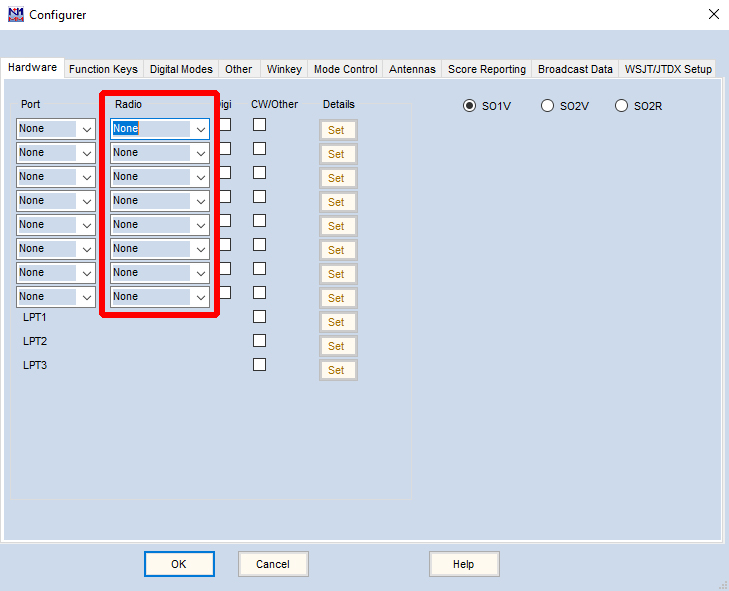
45. Now go to the “Digital Modes” tab and settings should as shown.
Digital Modes tab.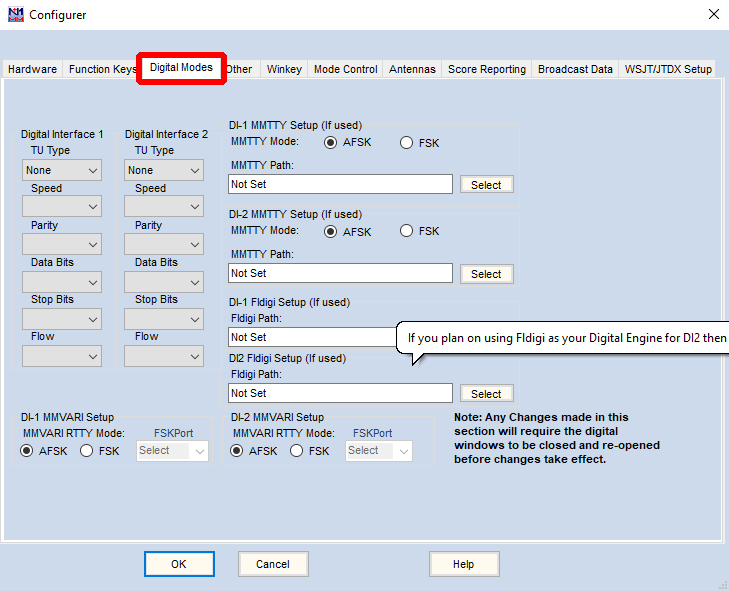
46. Now go to the “WSJT/JTDX Setup” tab. Several things here we need to worry about.
WSJT/JTDX Setup tab.
47. First thing we need to worry about is under “WSJT-X and JTDX UDP Settings”. We need to enable the UDP port.
WSJT-X and JTDX UDP Settings.
48. We need to check the “Enable” box.
Enable box.
49. Next we need to make sure the UDP port number is the same as in JTAlert that we set back at step 15, which is 2333.
UDP port number.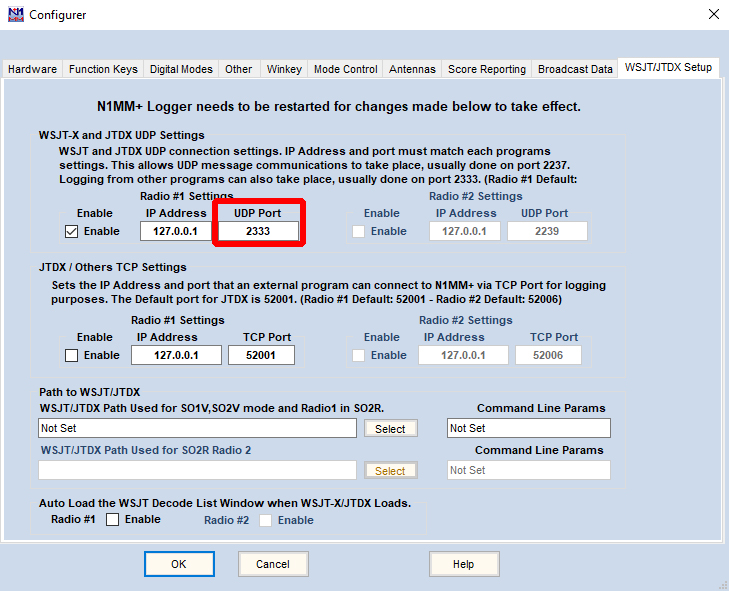
50. DO NOT set the path to WSJT/JTDX. We do not need to do this as for we are not using the Digital Interface in N1MM Logger+.
Path to WSJT/JTDX.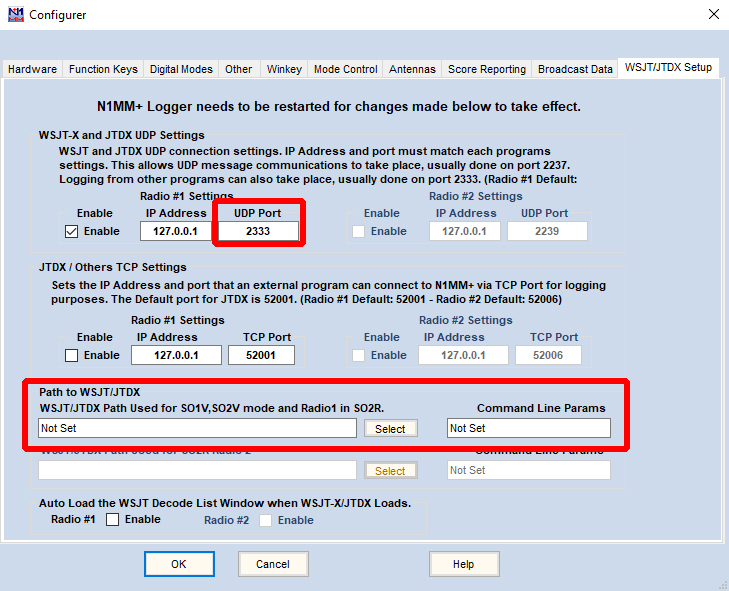
Finally Done!!! Click OK and you should be ready to go!!!!
In the end what will happen when you log a QSO is this WSJT-X will send the information to JTAlert then JTAlert will send the information to N1MM Logger+